
# Kimchi Fried Rice: A Flavorful Journey to Your Kitchen
## Introduction
Do you ever wonder how a simple dish can pack such a punch of flavor while being effortless to whip up? With just a handful of ingredients, you can create an incredibly satisfying meal. Today, we’re diving into the delightful world of **Kimchi Fried Rice**. This classic dish is not just about combining a few ingredients; it’s a canvas of flavors that tells a story of tradition and creativity.
In this post, we are going to explore the description of the ingredients, the timing of the cooking process, and the steps needed to recreate this beloved dish. Let’s get started!
## Ingredients List
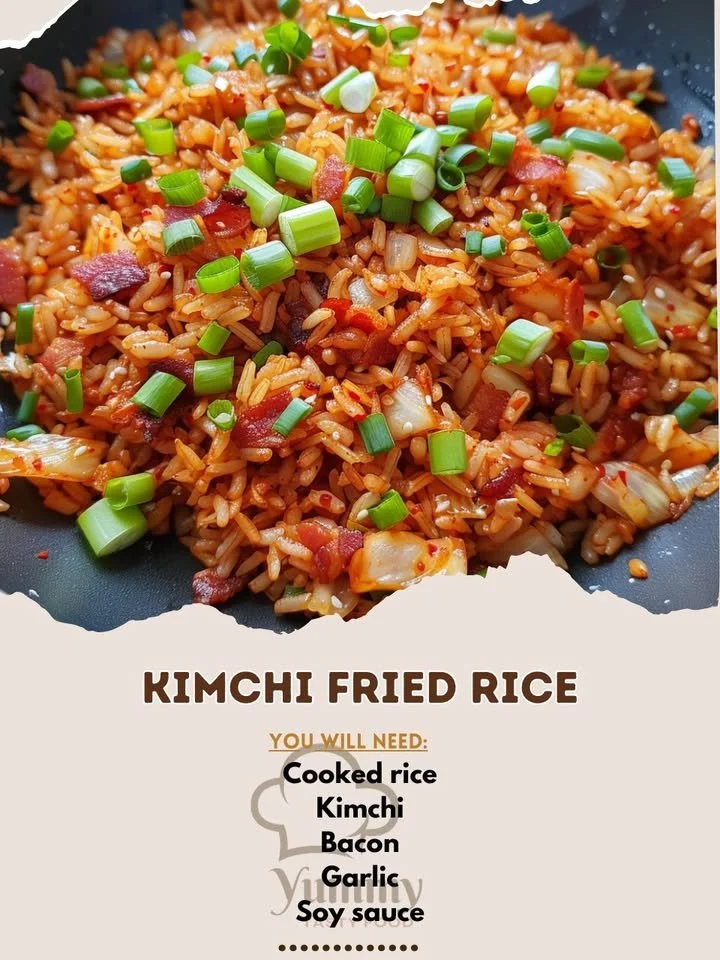
Creating the perfect **Kimchi Fried Rice** requires just the right balance of ingredients. Here’s what you’ll need:
- **2 cups cooked rice** (preferably day-old for the best texture)
- **1 cup kimchi**, chopped (the type and spice level can vary based on your preference)
- **1/2 cup bacon**, chopped (for a smoky flavor; feel free to substitute with plant-based bacon for a vegan option)
- **2 cloves garlic**, minced (adds depth to the dish)
- **2 tbsp soy sauce** (or tamari for a gluten-free option)
- **1 tsp sesame oil** (for added richness)
- **Green onions** for garnish (adds a fresh and colorful touch)
### Optional Substitutions:
- Substitute the bacon with **tofu** or **chicken** for a different protein option.
- Use **cauliflower rice** for a low-carb alternative.
- Add **bell peppers** or **carrots** for extra crunch and color.
## Timing
When it comes to whipping up **Kimchi Fried Rice**, timing is key. Here’s a breakdown of what you can expect:
- **Preparation Time**: 10 minutes
- **Cooking Time**: 15 minutes
- **Total Time**: 25 minutes (which is 20% less time than the average fried rice recipe!)
This brisk cooking time makes it an ideal choice for a quick weeknight dinner or a tasty lunch option.
## Step-by-Step Instructions
### Step 1: Prepare Your Ingredients
Start by ensuring all your ingredients are prepped and ready to go. Dice the bacon, chop the kimchi, and mince the garlic. Having everything in place will make the cooking process smooth and enjoyable.
### Step 2: Cook the Bacon
In a large skillet or wok, heat over medium heat and add the chopped bacon. Sauté until it's crispy and delicious, approximately 5-7 minutes.
### Step 3: Add Garlic and Kimchi
Once the bacon is ready, add the minced garlic and chopped kimchi to the pan. Stir-fry for an additional 2-3 minutes until the garlic is fragrant and the kimchi is well-heated.
### Step 4: Incorporate Rice
Now it’s time for your **cooked rice**! Add the rice to the pan and mix thoroughly, ensuring it's well-combined with the bacon, garlic, and kimchi.
### Step 5: Season the Rice
Pour in the **soy sauce** and drizzle the **sesame oil** over the mixture. Stir-fry everything for another 3-4 minutes, allowing the rice to soak up all the flavors.
### Step 6: Garnish and Serve
Once everything is combined and cooked through, remove the pan from heat. Serve garnished with sliced **green onions** for a fresh finish.
## Nutritional Information
Here’s a quick glimpse at the nutritional profile of a serving of **Kimchi Fried Rice**:
- **Calories**: Approximately 350 kcal
- **Protein**: 12 g
- **Carbohydrates**: 45 g
- **Fat**: 15 g
- **Fiber**: 3 g
These values may vary based on the ingredients used, especially if you opt for substitutions.
## Healthier Alternatives for the Recipe
If you’re looking to make your **Kimchi Fried Rice** even healthier or cater to dietary needs, consider these alternatives:
- **Use brown rice** instead of white rice for added fiber.
- Replace bacon with **mushrooms** or **zucchini** for a vegetarian-friendly option.
- If you prefer fewer carbs, consider using **quinoa** or **zucchini noodles**.
Regardless of which alternatives you choose, the essence and deliciousness of the dish will remain intact.
## Serving Suggestions
**Kimchi Fried Rice** can be enjoyed in various inspiring ways. Here are some serving suggestions to elevate your dish:
- Serve it with a perfect sunny-side-up egg on top for an extra touch of richness.
- Pair it with sliced avocado for a creamy complement.
- Consider adding pickled vegetables or a side salad for freshness.
Feel free to get creative; the beauty of this dish lies in its versatility!
## Common Mistakes to Avoid
While making **Kimchi Fried Rice**, here are a few pitfalls you should watch out for:
1. **Using Fresh Rice**: Freshly cooked rice can turn mushy. Aim for day-old rice for the ideal texture.
2. **Overcooking the Eggs**: If you decide to add eggs, cook them just enough to remain soft.
3. **Neglecting Flavor**: Remember, kimchi and bacon provide saltiness; adjust your soy sauce accordingly.
Avoiding these common mistakes will elevate your **Kimchi Fried Rice** to the next level!
## Storing Tips for the Recipe
If you’re planning to make this recipe in advance or have leftovers, here’s how to store it effectively:
- **Refrigerate**: Place the cooled **Kimchi Fried Rice** in an airtight container. It will stay fresh for up to 3 days.
- **Reheat**: For best results, reheat it in a pan over medium heat. Add a little extra oil or water to prevent sticking.
- **Freezing**: You can freeze it for up to a month. Thaw in the fridge overnight before reheating.
These tips will help maintain the flavors and textures of your dish!
## Conclusion
In summary, **Kimchi Fried Rice** is not only a quick and satisfying meal but a delightful blend of flavors that anyone can prepare with ease. By following this guide, you are well on your way to becoming a home chef who dazzles friends and family with an iconic dish.
So why wait? Take up the challenge, try out the recipe, and don’t forget to share your experience in the comments below or explore more delicious recipes on our blog!
## FAQs
### Can I use fresh kimchi instead of aged kimchi?
Absolutely! While aged kimchi offers deeper flavors, fresh kimchi will still make a delicious **Kimchi Fried Rice**.
### Is it possible to make this dish vegan?
Yes! Substitute the bacon with tofu or mushrooms, and use a vegan-friendly soy sauce.
### Can I make **Kimchi Fried Rice** as a meal prep option?
Certainly! This dish stores well in the fridge and can be easily reheated, making it ideal for meal prep!
### How spicy can I make my **Kimchi Fried Rice**?
You can control the spiciness by selecting mild or spicy kimchi based on your preference and adding chili sauce if desired.
### What can I serve with **Kimchi Fried Rice**?
This dish pairs well with side salads, pickled vegetables, or even a light soup to round out the meal.
Feel free to reach out if you have more questions or seek further culinary inspiration!