
# Creamy Garlic Butter Chicken: A Recipe to Savor
## Introduction
Have you ever wondered why some chicken dishes taste so incredibly rich and satisfying while others fall flat? The secret often lies in the **[description](#)** and balance of flavors in the cooking technique. Today, we're diving into a dish that embodies everything comforting and delicious about home-cooked meals: Creamy Garlic Butter Chicken. Packed with flavor and easy to make, it’s a recipe that ensures the tender chicken enveloped in a luscious garlic-butter cream sauce will satisfy any palate. Let's explore how you can prepare this dish in less time than you might expect, specifically 90 minutes, which is 20% less time than the average chicken dinner recipe!
## Ingredients List
To create this delectable dish, you’ll need the following ingredients:
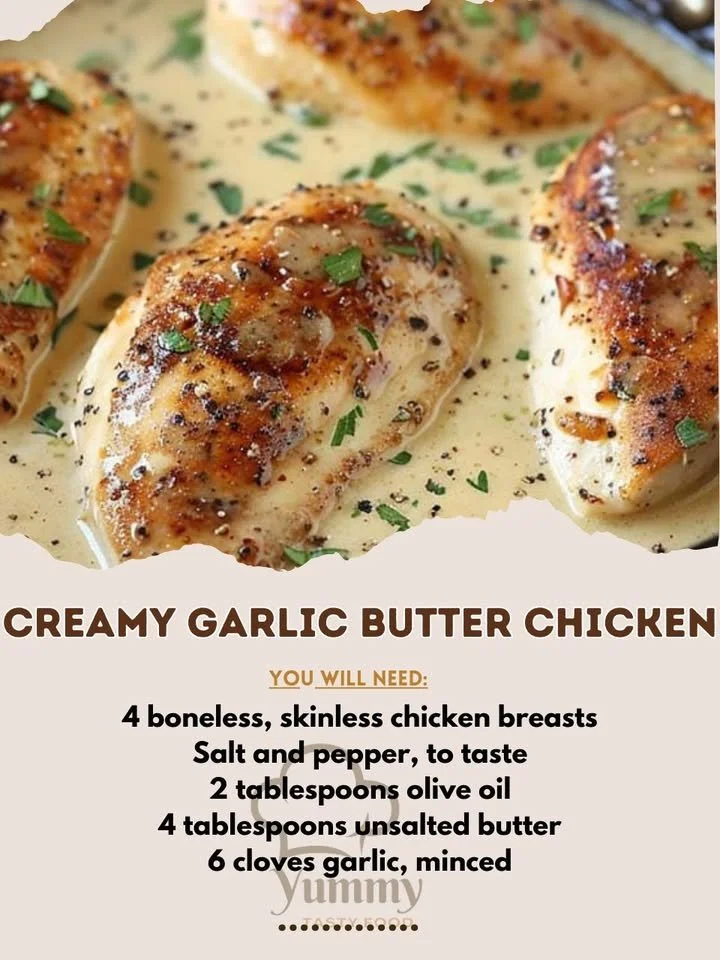
- **4 boneless, skinless chicken breasts**
- **Salt and pepper**, to taste
- **2 tablespoons olive oil**
- **4 tablespoons unsalted butter**
- **6 cloves garlic**, minced
- **1 cup chicken broth**
- **1 cup heavy cream**
- **1 teaspoon dried thyme** (or Italian seasoning)
- **1/2 cup grated Parmesan cheese**
- **Fresh parsley**, chopped for garnish
### Suggested Substitutions:
- **Chicken breasts** can be substituted with thighs for a juicier bite.
- If you're cutting calories, **heavy cream** may be replaced with half-and-half or a low-fat cream alternative.
- Swap **Parmesan cheese** with nutritional yeast for a vegan twist.
## Timing
The total time required to prepare and cook this dish is **90 minutes**, which is significantly less than many other creamy chicken recipes. Here's a breakdown:
- Preparation Time: **15 minutes**
- Cooking Time: **75 minutes**
This efficiency makes it a great choice for a family dinner or an impressive meal for guests without spending all day in the kitchen.
## Step-by-Step Instructions
### Step 1: Prepare the Chicken
Start by seasoning the **boneless, skinless chicken breasts** with **salt and pepper** on both sides. This simple step helps to enhance the overall flavor of the dish.
### Step 2: Sear the Chicken
In a large skillet, heat **2 tablespoons of olive oil** over medium-high heat. Once hot, add the chicken breasts and sear for about **6-7 minutes per side** until they’re golden brown and cooked through. Remove from the skillet and set aside.
### Step 3: Create the Garlic Butter Base
In the same skillet, lower the heat and add **4 tablespoons of unsalted butter**. Once melted, add **6 cloves of minced garlic** and sauté for **1-2 minutes** until fragrant, being careful not to burn the garlic.
### Step 4: Build the Sauce
Pour in **1 cup of chicken broth** to the skillet, scraping up any brown bits from the bottom (this is where the flavor lies!). Allow it to simmer for **5 minutes**, then stir in **1 cup of heavy cream**, **1 teaspoon of dried thyme**, and **1/2 cup of grated Parmesan cheese**. Let this mixture bubble away for about **3-5 minutes** to thicken slightly.
### Step 5: Reintroduce Chicken
Return the chicken to the skillet, spooning the sauce over each breast. Let it simmer for another **5 minutes** to ensure the chicken absorbs the flavors.
### Step 6: Serve
Once everything is cooked and the sauce is thickened to your liking, garnish with **fresh parsley**. Serve the dish hot over a bed of rice, pasta, or alongside sautéed vegetables.
## Nutritional Information
Nutritional details per serving (1 chicken breast with sauce):
- Calories: **590**
- Protein: **42g**
- Carbs: **6g**
- Fat: **45g**
- Fiber: **0g**
This meal provides a hearty helping of protein and fats, making it a perfect main dish for a balanced dinner.
## Healthier Alternatives for the Recipe
To make this dish lighter while still maintaining a delicious flavor, consider these modifications:
- Replace heavy cream with **coconut milk** for a non-dairy option.
- Use **skinless chicken thighs** for an increased moisture content but with slightly more fat.
- Add more **vegetables**, such as spinach or mushrooms, to enhance nutrient density and flavor without adding too many calories.
## Serving Suggestions
Pair your **Creamy Garlic Butter Chicken** with:
- **Mashed potatoes** or **cauliflower mash** for a comforting side.
- A fresh **green salad** dressed with lemon vinaigrette for a refreshing contrast.
- **Garlic bread** to mop up that delicious creamy sauce.
## Common Mistakes to Avoid
1. **Overcooking the chicken**: This can result in dry, tough meat. Use a meat thermometer (165°F is perfect).
2. **Burning the garlic**: Keep an eye on the garlic while sautéing; it should be just golden.
3. **Skipping the deglazing step**: Scrape the bottom of the pan to capture all those tasty bits that add depth to your sauce.
## Storing Tips for the Recipe
### For Leftovers:
- Allow the chicken to cool entirely.
- Transfer it to an airtight container and refrigerate for up to **3 days**.
- To reheat, gently warm on the stove over medium heat; add a splash of chicken broth to keep it creamy.
### For Meal Prep:
- Pre-cook the chicken and store it separately from the sauce.
- Combine and reheat before serving for the freshest meal.
## Conclusion
In summary, this **Creamy Garlic Butter Chicken** recipe is not only easy to follow but also quick to prepare, maintaining robust flavors and satisfying textures. Whether you're prepping for a weeknight dinner or a special occasion, this dish will impress and delight. Now it’s time for you to try it out! Don't forget to share your thoughts and variations in the comments below or explore similar recipes on our blog.
## FAQs
### What can I serve with Creamy Garlic Butter Chicken?
You can serve this dish with various sides like mashed potatoes, rice, or roasted vegetables for a complete meal.
### How do I know when the chicken is cooked?
The best way to check is by using a meat thermometer; the internal temperature should reach 165°F.
### Can I make this recipe dairy-free?
Yes! You can substitute heavy cream with coconut milk and use a dairy-free cheese alternative for a delicious outcome.
### How do I store leftovers?
Place cooled leftovers in an airtight container and refrigerate for up to 3 days. Reheat gently in a skillet with a splash of broth.
---
Now that you have all these tips and insights, get ready to create a dish that's sure to become a family favorite!